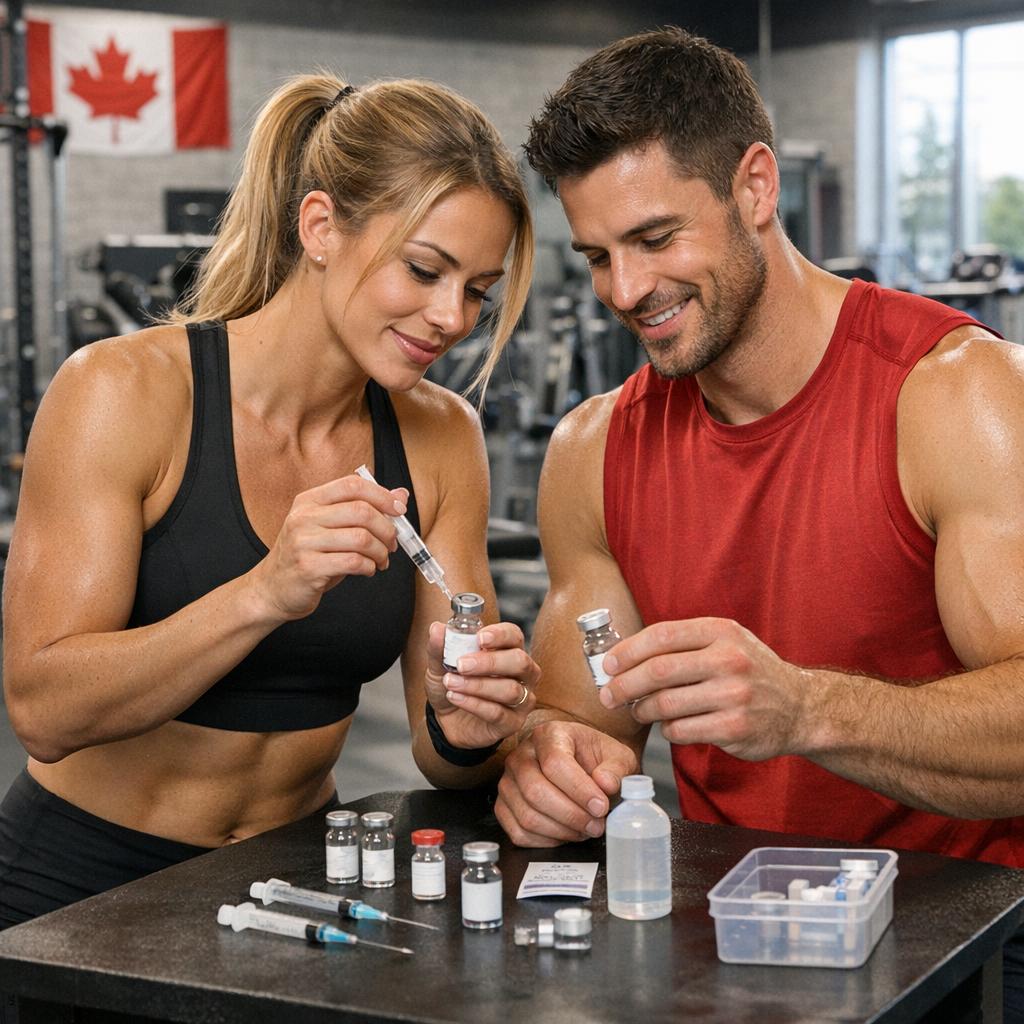
Reconstituting Peptides: A Visual Guide for Canadian Beginners
If you’re new to peptides, teh moment you open a vial of white powder can feel intimidating. How much bacteriostatic water? Which syringe? How slowly should you inject the liquid down the side of the vial? One small mistake can mean wasted product, inaccurate dosing, and a lot of frustration.
This visual, step‑by‑step guide was created specifically for Canadians who want a clear, confident starting point for reconstituting peptides safely, cleanly, and consistently—without getting lost in confusing jargon or conflicting advice.
Why This Guide Matters for Canadians
Peptides are increasingly popular across Canada—for research purposes, physique goals, injury recovery, and more. Yet, moast how‑to content online is either overly technical, geared toward other countries, or skips crucial details like:
- How to handle products shipped in cold Canadian climates
- What basic supplies are realistically available here
- How to avoid contamination and waste wiht simple, repeatable steps
In this article, you’ll walk through the entire reconstitution process from a beginner’s point of view: opening the vial, preparing your workspace, measuring the right volume of diluent, and mixing the peptide with confidence.
You won’t need a lab background. You won’t need expensive equipment.You will need patience, cleanliness, and a willingness to follow each step carefully.
What You’ll Learn in This Visual Guide
- The essential tools and supplies you should have on hand in Canada
- How to set up a clean, safe workspace at home
- Exactly how to draw and inject bacteriostatic water into your vial
- How to gently mix peptides without foaming or damaging them
- Simple math for calculating clear, consistent doses
- Storage, labeling, and handling tips to preserve potency
Every section is supported by clear visuals and plain‑language explanations, so you can follow along even if this is your very first vial.
Throughout the guide, you’ll see where beginners commonly go wrong—and how to avoid those issues with calm, methodical steps. The goal is not just to “get it done,” but to build habits that make future reconstitutions straightforward and predictable.
A Quick note on Safety and Legality
Regulations and approved uses for peptides can vary within Canada and may change over time. This guide focuses on the technical process of reconstitution and is for educational purposes only. It is not medical, legal, or prescribing advice.
Always consult a qualified Canadian healthcare professional and ensure you understand the legal status and appropriate use of any peptide product before handling or administering it.
With that foundation in place, you’re ready to move from uncertainty to clarity. The next sections will walk you through every step visually—so you can reconstitute your peptides with confidence instead of guesswork.
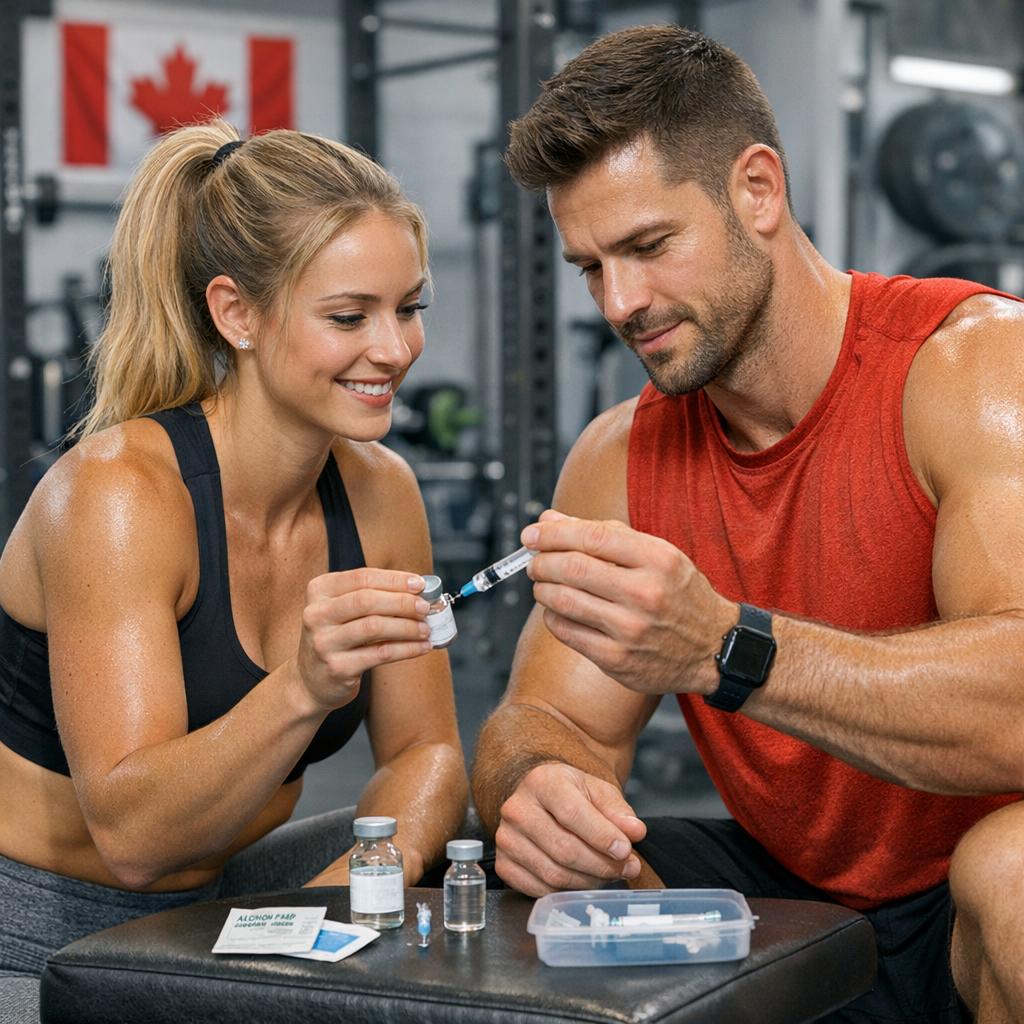
Reconstituting peptides can feel intimidating, especially if you are just getting started in Canada with strict regulations and unfamiliar terminology. this visual guide walks you step by step from unopened vial to properly mixed, clearly labeled solution, so you can work confidently, avoid waste and reduce common beginner mistakes
Think of your first peptide vial as a tiny lab in your hand: precision matters, but it doesn’t have to be stressful. This visual walkthrough translates dense Canadian regulations and technical jargon into clear, everyday language so you can match each image with a simple action—open, clean, dilute, swirl, label. By the end, you’ll know exactly what to do with that sealed vial, how much bacteriostatic water to draw, and how to record every detail so your solution is traceable, consistent, and stored safely.
Peptides arrive freeze‑dried for a reason: it protects their structure untill you’re ready to mix.When you first handle a vial, the bold lines and icons in this guide show you where to pause, what to read, and how to prep your space before a single drop is added. you’ll see clear close‑ups of labels, syringes, and alcohol swabs, plus simple overlays indicating where to insert the needle, how far to pull the plunger, and how slowly to inject the diluent to avoid foaming or damaging the fragile peptide. At each visual checkpoint, you’ll match what you see on‑screen with what you see on your bench, building a repeatable routine that feels orderly instead of overwhelming.
To keep everything compliant and tidy for Canadian use, you’ll also learn how to convert confusing terms—like “mg/mL” or “IU per mL”—into practical, written notes that live right on your vial. The guide includes minimalist, color‑coded cues so you can label concentration, date of mixing, and storage details at a glance, reducing beginner mistakes such as over‑diluting, misplacing vials, or forgetting when a solution was prepared. Along the way, shaded callouts highlight what to do if a stopper resists, if tiny particles remain after mixing, or if you accidentally draw up the wrong volume, helping you protect both your product and your confidence.
Understanding Peptides And Canadian Context Before You Open The Vial
Before any solvent touches the powder, it helps to know exactly what you’re handling and how it fits into the canadian landscape. Peptides are short chains of amino acids designed to mimic or influence natural signals in the body—some are being studied for fat loss, muscle preservation, recovery, and even skin health. On your bench, that crisp white puck or film at the bottom of the vial is a fragile, freeze‑dried substance that can degrade with light, heat, or careless handling. Viewing it as a high-precision research tool instead of “just another supplement” will keep you focused on accuracy, cleanliness, and consistency from the very first drop of bacteriostatic water.
In Canada, this all happens inside a unique regulatory and practical framework. Many research peptides exist in a gray zone: they’re not approved medications for general use, yet they’re accessible through “research only” suppliers. That means you must stay alert to Health Canada guidance, import rules, and what your specific province permits.Before you open anything, confirm that: (1) your source is reputable, (2) the product is clearly labelled as a research chemical, and (3) you’re not crossing legal boundaries by importing restricted compounds. To ground your decisions, keep these core distinctions in mind:
- Purpose: Research vs. therapeutic use in a clinical setting.
- Status: Health Canada–approved drug vs. unapproved research peptide.
- Source: Licensed pharmacy / clinic vs.research chemical supplier.
- Documentation: Presence of lot numbers, COAs, and clear storage instructions.
| Aspect | Canada-Focused Checklist |
|---|---|
| Label | English/French, peptide name, dosage, lot & expiry clearly visible |
| Supplier | Canadian-based or trusted importer with clear policies |
| Storage | Shipped with cooling when needed; refrigerated on arrival |
| Intent | Clearly defined research purpose and record-keeping plan |
Choosing The Right Bacteriostatic Water And Supplies For Safe Home Reconstitution
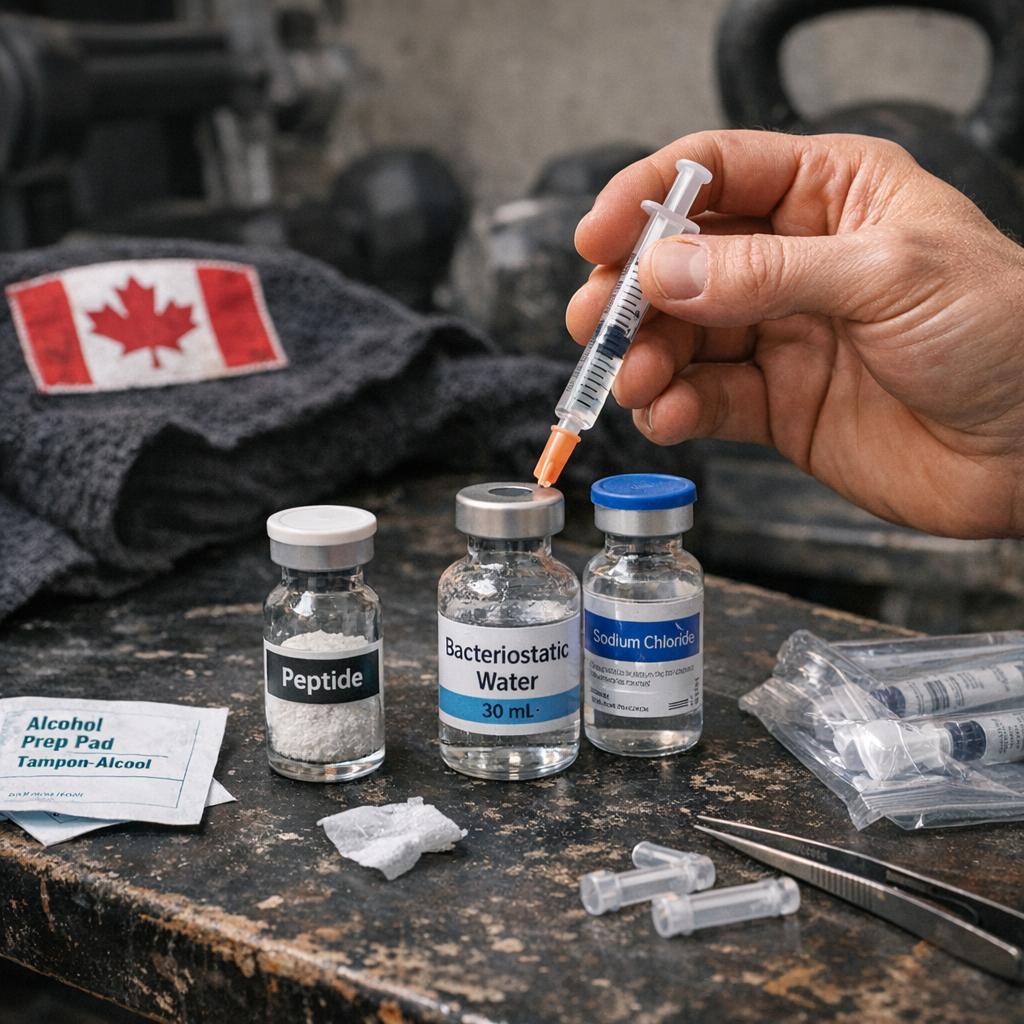
For safe,repeatable results at home,your solvent and tools matter as much as the peptide itself. In Canada, that usually means Health Canada–approved bacteriostatic water, sterile needles, and low‑shed alcohol swabs sourced from trusted pharmacies or regulated suppliers.Think of this kit as your “clean lab in a box”: each item reduces contamination risk, protects peptide integrity, and helps you draw, mix, and store with confidence instead of guesswork.
When you’re building your reconstitution setup, start by distinguishing between bacteriostatic water and regular sterile water. Bacteriostatic water contains a tiny amount of benzyl alcohol that slows bacterial growth after the first puncture, making it better suited to multi‑dose vials. In Canada, always confirm the label shows “Bacteriostatic Water for Injection”, an expiry date, and intact packaging. Pair it with supplies that support sterile handling,such as:
- Insulin or 1 mL syringes with clear,fine graduations for accurate dosing
- Appropriately sized drawing needles (e.g., 18–23G) for transferring water into the vial
- Alcohol swabs to clean vial stoppers and your workspace
- Nitrile gloves to reduce skin contact and accidental contamination
- label stickers for date, dose, and concentration once mixed
| Item | What To Look For | Why It Matters |
|---|---|---|
| Bacteriostatic Water | Health Canada–approved, sealed, in‑date | Supports multi‑use vials safely |
| Syringes | 0.3–1 mL, clear markings, individually wrapped | Accurate, repeatable dosing |
| Needles | Proper gauge for drawing vs. injecting | easier handling, less vial damage |
| Alcohol Swabs | 70% isopropyl, low‑lint | Cleaner stoppers, lower contamination risk |
Step By Step Visual Reconstitution Technique For clear Lump Free Peptide Solutions
Imagine watching your peptide powder slowly “disappear” into a perfectly clear solution—no clumps, no floating specks, just a clean, glassy vial ready for precise dosing.That’s the power of a careful, visual reconstitution process. By slowing down, controlling each micro‑step, and using your eyes as your main quality check, even beginners in Canada can turn intimidating lyophilized powders into professional‑looking solutions with confidence.
Lay everything out on a light background so every movement is easy to see, then move from dry to dissolved like you’re following a lab choreography. With gentle swirling, drop‑by‑drop hydration, and consistent lighting, you’ll clearly spot undissolved particles, air bubbles, or colour changes before they become a problem. The goal is simple: a solution that looks as clean as it measures.
Start by placing the sealed peptide vial and bacteriostatic or sterile water on a flat,well‑lit surface—ideally with a white towel or paper underneath to maximize visual contrast. Swab the rubber stoppers with alcohol and let them air‑dry until fully matte, then draw your chosen volume of diluent slowly so the syringe barrel remains free of bubbles. When ready, insert the needle into the vial wall at a slight angle and allow the liquid to trickle down the inside glass, never blasting directly onto the powder cake.This gentle waterfall effect helps the powder hydrate evenly, preventing stubborn clumps and foaming. As the liquid level rises, watch how the powder softens: at first it may look like wet sand, then a cloudy slurry, and finally a clear, uniform solution.
Once all diluent is added, keep the vial upright and use slow, controlled wrist movements to swirl—do not shake. You’re aiming for a smooth “orbit” of liquid around the vial walls, which encourages full contact between water and peptide without introducing micro‑bubbles or mechanical stress.As you swirl, visually inspect from multiple angles:
- Clarity check: Hold the vial against a white background—solution should appear clear or slightly opalescent, never milky.
- Residue check: rotate the vial—look for powder stuck at the shoulders or under the rubber stopper.
- Colour check: Confirm there are no unexpected colour shifts (e.g., yellowing, dark specks).
Visual Dissolution Stages (What You Should See)
| Stage | Appearance | Action |
|---|---|---|
| Initial Wetting | Powder darkens, looks like wet snow | Keep adding diluent down the glass |
| Cloudy Swirl | Hazy, no large chunks | Gentle swirling only |
| Final Clear | Clear or slightly opalescent | Stop swirling, inspect under strong light |
Labeling Storage And Stability How Canadians Can Keep Reconstituted Peptides Potent
Proper labeling and storage are where reconstituted peptides either stay razor‑sharp or quietly lose their edge. With a marker, a few labels, and a clear system, Canadians can turn a cluttered fridge box into a precise “mini-lab” that keeps every vial traceable, compliant, and potent for as long as its chemistry allows.
Think of each vial as a tiny, high-value project that needs its own “file.” As soon as a peptide is mixed, add a clear label that includes: peptide name, concentration (e.g., 2 mg/mL), date and time of reconstitution, and storage conditions (e.g.,2–8°C). For Canadians juggling multiple vials, colour‑coded dots or symbols make it simple to distinguish morning vs. evening use or different protocols at a glance. Always use waterproof labels and permanent ink; condensation in the fridge can blur cheap stickers and turn crucial details into guesswork.Keep a simple written or digital log that mirrors your labels so that if one falls off,the information isn’t lost.
Stability isn’t just about cold temperatures; it’s about consistency and protection from light and repeated temperature swings. Store vials in a dedicated container on a middle shelf of the fridge (not the door), and avoid opening the door more than necessary to prevent cycling between warm and cold. Whenever the manufacturer recommends freezing, divide the solution into smaller aliquots so you can thaw only what you need, once. To make decisions simple, use a quick‑reference system:
| Label Code | Meaning | Action |
|---|---|---|
| “F” | Keep frozen at −20°C | Thaw once, never refreeze |
| “R” | Fridge only, 2–8°C | Use within labeled days |
| “X” date | Expiry after reconstitution | Discard after this date |
- Use waterproof labels and permanent marker.
- Write name, strength, date/time, storage on every vial.
- Log each vial in a notebook or spreadsheet with lot and source.
- Store in a clean, dedicated container away from food items.
- Protect light‑sensitive vials in amber glass or foil wrap.
Troubleshooting Cloudiness Particles And Dosing Errors With Beginner Friendly Fixes
Cloudy vials, floating specks and “off” doses are the most common beginner frustrations—and they’re almost always fixable. Think of every flaw as feedback from your vial: cloudiness can hint at rushed mixing, wrong solvent temperature or accidental contamination, while stubborn particles often point to damaged peptide or tiny bits of stopper pulled in by an aggressive needle. Instead of tossing the whole vial, you can usually recover by slowing down, re‑checking your tools and using a few simple visual checks that work the same in Toronto, Vancouver or a small Prairie town.
When your mix looks “off,” start with easy, low‑risk fixes before assuming the peptide is ruined. Slight milkiness right after adding bacteriostatic water is often just micro‑bubbles or cold solvent—not permanent damage. Gently roll the vial between your fingers rather than shaking, and let it sit at room temperature for 10–15 minutes.If you still see obvious specks or stringy bits,hold the vial against a light background and look closely:
- Hazy but no chunks: allow more time and gentle rolling; avoid heat.
- Firm particles on the bottom: peptide may not be fully dissolved—add a tiny bit more solvent and swirl.
- Black or rubbery flecks: likely stopper fragments—do not draw these up.
- Persistent cloud with odour or colour change: treat as compromised and discard safely.
| Problem | Likely Cause | Beginner-Friendly Fix |
|---|---|---|
| Cloudy mix | Cold solvent, shaking | Let warm slightly, roll gently, wait 10–15 min |
| floating specks | Stopper fragments | Keep needle off stopper, avoid drawing visible specks |
| Wrong dose per mark | Math slip or wrong volume | Re‑do volume math, label vial clearly, use one syringe style |
What It Comes Down To
You’re Now Ready to Reconstitute with confidence
You’ve just walked through the full visual roadmap of reconstituting peptides—step-by-step, in plain language, and tailored for Canadians. From understanding vials and solvents to measuring,mixing,and storing safely,you now hold the practical framework needed to move from uncertainty to precision.
Bringing It All Together
Reconstituting peptides may have looked intimidating at first, but it ultimately comes down to a repeatable sequence: plan your dose, choose your solvent, calculate your volume, mix gently, and store correctly. With each repetition, the process will feel less like “chemistry” and more like a clear, methodical routine.
The visual framework you’ve followed here is designed to do more than “show you the steps.” It helps you:
- Understand why each step matters,not just what to do.
- Spot and avoid common beginner mistakes before they happen.
- Build a consistent setup that you can replicate every single time.
- make informed decisions within the Canadian context of access, storage, and climate.
Core Takeaways to Remember
- Accuracy is everything: Use proper syringes, measure twice, and write your calculations down.
- Gentle handling protects the peptide: Let the solvent run down the vial wall; swirl, don’t shake.
- clean technique reduces risk: Alcohol swabs, new needles, and a tidy workspace are non‑negotiable.
- Storage can make or break potency: Respect temperature guidelines and light exposure,especially through Canadian season changes.
- Documentation builds consistency: Track dates, concentrations, and any observations in a simple logbook.
Navigating the Canadian Context Responsibly
As a Canadian beginner, you’re operating within a regulatory environment that continues to evolve. Availability, import rules, and guidance can differ from province to province and from one supplier to another.
that’s why it’s critical to always:
- Consult a qualified healthcare professional before using any peptide.
- Verify that your source is reputable, transparent, and compliant with Canadian rules.
- Stay updated on Health canada advisories and local professional standards.
From Beginner to Competent Practitioner
Every confident practitioner started exactly where you are now—unsure about volumes, nervous about contamination, and worried about “doing it wrong.” What separates beginners from experts is not natural talent; it’s repetition with intention.
You build that confidence by:
- Following the same structured workflow each time.
- Checking your math and notes before you draw a single millilitre.
- Reviewing your visual steps if something feels unfamiliar.
- Reaching out to qualified professionals when you hit a grey area.
Your Next Practical Steps
- Assemble a dedicated, clean workspace with all required supplies.
- print or save your favorite visual diagrams from this guide.
- Practice calculations on paper using “mock” vials before doing the real thing.
- Discuss your plan with a healthcare provider familiar with peptides.
- Document your first full reconstitution from start to finish, including any lessons learned.
With this foundation, you’re no longer just “trying to figure it out.” You’re approaching peptide reconstitution as a structured, repeatable, and safety‑focused process—exactly how it should be.


Add comment
You must be logged in to post a comment.